Thursday, March 27, 2014

Simple Fix

Under my sink lies a lot of hair stuff.  Curling irons, flat iron, hair dryer, hair gunk for all styles and a little makeup.  Originally, my organization was working.  Just a little crate full of stuff as well as a magazine holder to hold my dryer and irons...but I somehow accumulated more gunk and the crate was over flowing.  Here's what it looked like:
It was all contained but was over flowing and it was starting to look messy.  No. Thank. You.  So, here was my simple fix:

Yet another Container Store find.  It was on sale for $3.29, and I purchased two with the intentions of converting everything under the sink into these.  While my intentions were good, but not measured out (I didn't measure anything before purchasing...so it bit me in my behind - just a little nip), two wouldn't fit under the sink.  BUT, one did:

BEFORE


AND THE AFTER

While this wasn't a HUGE change, it was still a change for the good.  All of my hair products are current (not nasty old stuff) and in a larger container with my makeup and brushes/combs.  The black magazine rack holds the dryer and irons perfectly.  It's a metal magazine rack and I think it works better than a plastic one - just is a little heavier and can hold the weight of the contents.  I'm not going to lie and say that it doesn't bother me that the containers don't match - I'm super weird about that...again, my OCD, forgive me.

After writing this, it made me giggle because for anyone who knows me, I'm not one to "do" my hair on a regular basis.  Drying it is an accomplishment for me and I consider that "styled".  But looking at all these hair products makes it look otherwise...don't be fooled folks!  Do. Not. Be. Fooled.

This is just a post to show that the simplest of changes can make all the difference!!!  AND, just so you know, Walmart and Dollar Store (General, Tree) have great selections that would work just as well as this one!!! I just happened to stock up on some random bins, baskets, and such when I was at The Container Store.  Man I love me some organizing supplies!!!

*Side Note:  I have NO IDEA how to rotate photos!  So for now, get creative and turn your head...consider it a stretching exercise.*

Tuesday, March 25, 2014

A Day In The Life

I am a very lucky woman.  I get to be a part-time stay at home Mom as well as a part-time career woman.  I get to experience two very different sides to being a parent.  That being said, there are measures that Hubs and I take to make sure that things run smoothly every single day.  But, the days that I work, there are greater measures we take to go from getting out of the house in the morning to coming home and doing the night routine (dinner, bath, bed...) with the Littles.  Here I am going to break it down for you as to what kinds of things we organize ahead of time to make those busy work days a little easier for all of us.

THE NIGHT BEFORE:
  • Check my infamous planner.  Seems simple right?  Well, this lovely spiraled notebook of life helps remind me of very important things:  snack duty at school, pj day at daycare, library books are due, appointments...the list really does go on and on.  It's just a good idea for me to check this the night before so I can prepare ahead of time:
  • Set out clothes for the kids.  I get both Sweet Pickle and Peanutty's outfits gathered and set out (in the same spot every time) for the morning.  They know that getting dressed is part of the morning routine, so to have it sitting there for them when they wake up really helps!
  • Get the coffeemaker loaded and ready to roll!  This one is very important.  I love drinking my cuppa deliciousness while I'm driving into work. 
  • Get lunches rounded up - as much as possible.  I take inventory of what's available for lunch in the fridge and cupboards.  I get Peanutty's packed as much as I can (never make a sammy {sandwich} the night before - who wants soggy break, ick!), and get ideas for Hubs and me.  We do the grab and go approach in the morning.
  • Check the meal plan.  Now, with my meal planning, breakfast is one that we never follow.  Huh, you ask?  What I do with my breakfast planning is I take inventory of what we have available for breakfasts (cereal, oatmeal, waffles, french toast, muffins, bagels, pancakes...you get it) and write down one for each day.  We never know what the kids will be in the mood for when they wake up so we let them tell us what they'd prefer.  In some ways it's kind of like being a short order cook (we do NOT let them tell us what they want for dinner, that's set in stone and they get what we make), BUT, we'd much rather them eat a good breakfast to start their day than boycott the food we make if they're not in the mood.
  • Check the meal plan, again.  This is where we look to see what's on the menu for the following night.  This gives us a chance to get meat out to thaw in the fridge, or prepare a casserole, or get a concoction going for the crock pot...whatever it is, we get it "started" for the next night.
  • Pack backpacks.  Make sure that everything (with the exception of lunches) is in the backpack and ready to grab and go!
  • Load and run the dishwasher and/or washing machine - of course only if you have enough for full loads!
MORNING OF:
  • Wake up early enough.  I know this seems like a no-brainer, but let me tell you, the extra 5 minutes makes a difference.  While I'd like to say that things ALWAYS go smooth when we follow these preparations - it's not always the case.  Someone inevitably: spills milk all over themselves and floor, refuses to get dressed, doesn't feel like brushing their teeth...you get the picture.  BUT, waking up early enough pays off.  For example, the other morning I had enough time to switch out some laundry and unload the dishwasher.  Which made coming home that evening MUCH easier.
  • Load the toothbrushes.  I'm the first one up and at 'em in our home.  So, that means I'm the first to scrub the pearly whites.  Since I'm already loading my toothbrush with the paste, I do everyone's at that time as well.  I just set it on the sink and when it's time to brush, they can easily do so.  Believe me, in my home toothpaste application can be a battle.
  • Start the crock pot, if needed (love the crock pot!!!)
  • Clean up coffeemaker.  I don't leave mine on the counter.  It's that whole clutter in the kitchen feeling I get, so I make sure to clean out the coffeemaker and set it out to dry for the next use.  I'm weird, and I'm OK with that.
  • Turn down or turn up the thermostat.  This is just a little money saver idea for you all!!!  It really does help and if you have a programmable thermostat, that's even better!!!  We do, but don't utilize it only because there are days when we're home.
AFTERNOON:
  • Whoever gets home first gets dinner rockin' and rollin'.  Our kids are STARVING by the time we get home and it has caused some serious meltdowns - so, we solve that by having dinner cooking and almost ready to eat by the time everyone gets back home.  Hubby and I communicate pretty well so we're both on the same page as to whats for dinner, BUT, this is where the weekly meal planner comes in handy.  If he's forgotten, he just checks it and gets things going.  So easy!
  • The first thing we do when we get home is go through the mail. Sort it, throw it, recycle it and then put it in our respective cubbies and yes, this is what they usually look like until the weekly cleaning happens:

  • ***Side note, these bullets are really starting to irk me!!!***
  • We also go through the kids back packs to see what needs to be addressed.  Assignments, notes home, newsletters...etc.
  • Cleaning out the lunch box/bags.  The kids are involved in the going through backpacks to sort through the stuff.  They are also in charge of hanging their coats up, putting away winter wear and hanging their backpacks up. 

All of these preparations lead us into dinner, bath, movie/books and bed.  It's organized chaos!!!  But, we've got a rhythm down and it works for us.  Speaking of meal planning (I know we weren't talking about that but...), I thought I'd share my FAVORITE recipe right now.  I could eat these every week if everyone else was on board!!!  It's easy, doesn't take too long and can be prepped ahead of time!  WOOT!!!


The ONLY alterations I've made to this recipe is that I add about 1/8 cup of vinegar to the mixture before baking.  It adds a little zing to it (my sisters idea actually-doubt she reads this but a shout out to her!)!!!  I also make a homemade instant rice - you could eat this as a side dish or just pile on the meat and veggies to make a fajita bowl (my fave way to eat it).  Here's my recipe for my rice:

1 can (15 oz.) petite diced tomatoes
1 cup water
3 cups instant rice
Garlic salt
Garlic powder
Onion salt
Onion powder

Make rice according to box direction, just add in spices when water and tomatoes are boiling.  It's simple and fluffy!  The dish is delish!!!


Tuesday, March 18, 2014

My Favorite Find

Three of my sweetest girlfriends and myself did a quick day trip to The Container Store - as well as IKEA.  I really didn't have a list of items that I wanted/needed to purchase, I was kind of along for the ride and the fun!  I'm one of those people who gets really lucky when it comes to sale and clearance racks.  That's why I encourage you all to make a bee line for those types of areas because you really never know what you'll find.  Well, at TCS, I found two gems that were a must have!  Simple to the eye, but the possibilities are endless:

I know you're thinking:  they're glass canisters.  Big whoop.  Well, these two babies were supposed to have lids and were regularly priced at $19.99 for the large and $17.99 for the small.  But, I brought these home for the one time payment of $7.59 for the large and $7.29 for the small.  I had no idea what I was going to use them for but I was thinking along the lines of either using it to make a center piece or to store something (weird, I know - wink, wink).  These are very thick glass and have already been dropped (yes, by me - oops) but didn't crack or shatter.  That's a bonus.  So here's what I decided to do with them...for now:


I have been struggling trying to figure out what to do with all my thread.  While I love the idea of the wood thread holders (spray paint those suckers and it'd be a colorful addition to any space just by having all the thread showing!), they run about $25 for a smaller version.  I don't want to spend that much, I'm cheap.  I've thought about doing a peg board and putting all my thread on it, since that's all the craze right now.  Too much work.  AND, I'm not at a point where I'd want to hang my sewing supplies on the wall yet.  I'm just starting to get into sewing, and while I do love it, I'm not sure if it's a hobby that will last.  So, a dedicated shelf will do for now!  Anyway, in comes my canister!  I decided to fill that bad boy up with all my threads (I'm lucky my Grandma sent me a bunch of thread she wasn't using or else my canister would have had about 6 spools in it).  I think it's pretty cute and another simple way to add some color and flare to my sewing shelf.  The larger canister has some scrap fabric in it.  Not sure I'm wild about it, but I'll roll with it for now.  I'm gearing up for some serious cleaning and organizing (because really, the two come hand in hand), so who knows where I'll need it next!!! 

Something so simple can be turned into something fantastic!!!  That's why these canisters are My Favorite Finds from our turn-and-burn trip!

Thursday, March 13, 2014

Peanutty's Closet

Ok, it's no surprise that kids grow, but I'm in denial that mine do.  Peanutty is getting bigger...that means bigger clothes...that means his clothes take up more space...that means what we currently are doing to organize/store clothes isn't working...as he grows the storage just gets smaller and smaller.  Sad.  One morning I walked into his room to find that he'd dressed himself but in the process of finding the perfect shirt, he had trouble returning the clothes the way they were (which was folded and neatly stacked - FYI):


The wood bench is actually a drawer unit that fits under his bed.  With the help of Hubs and my Aunt, we turned it into a bench.  He likes to play trucks on there (obviously), and I will sit in there when it's Lego building time.  I trade out his clothes in these drawers according to season.  So, right now there are pants and long sleeved/sweat shirts in them.  I store his summer garb in his closet in a Sterilite black drawer unit.  Well, on this particular day, he just HAD to wear a specific t-shirt.  As you can see, once he found it, he completely "forgot" to put the other tee's away.  I haven't utilized his closet because we had the drawers in his room...but the time has come to convert to the closet.  Here's what it looked like before:
Hardly anything was hung...I forgot to take a pic before I started hanging so there are a few shirts in there.  So, after some hangers, Sweet Pickles "help" (she ran off with quite a few of my hangers), and about 30 minutes of work, here's what I came up with:


Bam!  It was that quick and painless.  I had been thinking of doing this for a while now, but it wasn't until the "tornado" breaking point that made me follow through.  I wanted to use actual shelves, but that would have required them to be built or bought, and I didn't want to do that.  I had a Sterilite drawer unit that we weren't using that used to hold Legos:

I put it in his closet and started filling it up.  It works great.  Between hanging the clothes and the drawer unit, all of his clothes for ALL seasons fit in his closet.  The drawer unit is busting at the seams (it works for now), but I have another identical Sterilite drawer unit that will become available in the next couple months so I can spread all his clothes out within two (I'm now wondering if both will fit side by side in there - if not, I will come up with something else!).  I had two plastic baskets that I had purchased from The Container Store (again, any container would work, I just had these) and they were $2.99 each.  Those sit on top of the drawer unit and hold his unmentionables and socks.  I haven't labeled the drawers but I think I'm going to have to since Hubs is none too happy about me re-organizing...again.  This happens a lot!  So, I will have to bust out me Washi tape and me label maker!!!  I hung all the tops and it is so much nicer to see everything at a glance - especially since Peanutty likes to dress himself.  I placed an old diaper box in the closet as well.  This is useful for throwing clothes in it that no longer fit and will be either garage saled, handed down or donated.  Hooks inside the door hold a couple jackets and zip up sweatshirts.  This also freed up all the drawers in the bench...not sure what we're going to put in those (not toys...I'm fixin' to overhaul those soon...I'm procrastinating because I find this to be a painful process), but they're open and ready to go!!!

Tuesday, March 11, 2014

Springs Coming!

Two weeks ago, I decided I wanted to start browsing for Easter basket items for Peanutty and Sweet Pickle.  You can never start too early, and I thought that I may be lucky and stumble across a few ideas and/or deals.  Well, I did.  And I completed both baskets in that one day.  I know Easter isn't for quite a few weeks, but I love to shop for the kids...and be done ahead of schedule...and check one more thing off the old list. 

When I was a kid, the Easter Bunny would fill my basket to the brim with candy.  Oh man, how I loved that basket - especially Rainblow egg bubblegum.  Sigh, it was a great thing to chew...until it got so hard and lost its flavor.  Easily fixed - just pop a new one in your mouth.  Delish.  Anyways, these days, I really only like giving the kids candy every so often.  Yes, I indulge from time to time, but isn't that one of the perks of being an adult?  You can say "I get to eat this king size Butterfinger before dinner because I'm the Mom (or Dad)".  Yes, I've done this - and it was so worth picking out the packed in peanut butter goodness from my teeth for the following 20 minutes.  Again, back on track Megan!  That all being said, I like to put fun other items in the kids' baskets - with a few sweet treats.  So, I'm going to share with you what I found.  AND, I'd also like to put it out there that I spent roughly $25 on each basket.  These things that we adults get to do for our children (Santa, Tooth Fairy, Easter Bunny) is not only fun (and sneaky-you get to see what you're really made of in this department) but it can also be expensive - I thought I did pretty good this time around since I tend to get a little carried away sometimes.

We'll start with Peanutty - he is 5 1/2 years old:
  • Shark metal basket is from Pottery Barn Kids (I said I didn't shop at Pottery Barn, but I do partake in PBK clearance stuff from time to time) for $7.  This is NOT included in the $25 only because he's had this basket for 3 years and will continue to use it.
  • Books.  We LOVE books!!!  I purchased two Lego books that were $7 total for both.
  • Bunny silly straws. These were from Michaels and were $2 for 2.
  • Foam carrot rockets - purchased at Target in the dollar bins - $1.
  • Bunny sling shot - probably going to regret getting this but it's so something this kid will get a kick out of - again, Target dollar bins - $1.
  • Skylander trading cards - these usually run $1.99 but they were on sale for $1.29 at Target
  • Skylander Qubi (it's an ink stamp for crafting) - these usually run $2.99 but was on sale for $2.49 at Target.
  • Mini carton of Goldfish crackers - Target $1.
  • Annie's Homegrown Bunny Grahams - Target $1.
  • Whoppers carton of Robin Eggs - Target $1.
  • Survival bracelet - from Michaels $4
  • Jelly Belly bag - Target $1.
  • Bunny Burst Tic Tac's - Target $1.
  • Micro Terranrium - Prehistoric Fern - Michaels $1.29  This was my FAVORITE find for his basket:

And for Sweet Pickle who is 2 1/2:
  • Mermaid metal basket from PBK - $7 but not included in the $25 total.
  • Purple tutu - Target dollar bins $3.
  • Spring socks x 2 - Target dollar bins $1 each so $2 total.
  • Frozen book (the kid LOVES this movie, but so hard to find merchandise) - $4.
  • Jumping Frogs game - Target dollar bins $1.
  • Bunny silly straws - Michaels set of 2 for $2.
  • Disney Fairies, Princesses and Minnie tattoos - Michaels $3 for all.
  • Jelly Belly bag - Target $1.
  • Whoppers carton of mini Robin Eggs - Target $1.
  • Goldfish carton - Target $1.
  • Annie's Homegrown Bunny Grahams - Target $1.
  • Bunny Burst Tic Tacs - Target $1.
  • Micro Terrariums Fairie's Favorite Flower - Michaels $1.29
  • Stunt Ribbon - Michaels $2.99 this was my FAVORITE find for her basket:
And there you have it!  We're ready to rock and roll for Easter!!!  Here are some other ideas:
  • Small Lego set
  • Crafting supplies - paper, markers, crayons, stencils, glitter glue, stickers, stamps, paper...this list could go on forever.
  • Hot Wheels cars
  • Play jewelry
  • Glider airplanes - Michaels has an extensive aisle with all sorts of random fun stuff in it.  Ranging from $1-$3
  • Target had a TON of other items as well in their dollar bins.  I highly recommend browsing these aisles.
  • Seeds - either for a veggie/fruit garden or flowers.  Playing off that theme, you could put in a kids set of gardening tools, gloves, little pots and some soil.
  • Walmart also carries some fun little stuff in their seasonal aisles.  Just need to look around and find some steals.
  • Movies
  • Books
  • Panini sticker books - these are themed books that you can purchase packets of stickers to go in them.  Sweet Pickle has the Disney Princess one that I got at The Dollar Store - it was $1 (duh) and the sticker packs have 7 stickers in them for $1.  They also have an Avengers book - they had this at the Dollar Store as well as Target.  During the Christmas holidays they had a Disney Christmas themed book and stickers out.  I love these books.
Those are just a few ideas and but there are so many more!!!  Have fun with it, because this is one of the many bonuses to being an adult!  That and the Butterfinger before dinner...just saying. 

Happy Tuesday!!! 


Thursday, March 6, 2014

Counter This & That

Counter clutter is a serious no-no in my home.  If there is ONE area in this house that MUST stay clean, it's the kitchen/dining room.  They are all one room but it's separated by a peninsula that has our cook top on it.  I've said it before in a couple different posts that I spend a LOT of time in the kitchen area in any given day (cooking, all the kids' school and daycare bags, 'Command Center'...it's all in this area).  If I'm going to be productive, I have to have a clean and tidy space.  As a matter of fact, before I begin any kind of project (big or small) I have to start with a clean space.  That's probably the OCD in me, but I have to have that peace of mind before getting productive.  Hubs enjoys placing things on the counter or kitchen table to only watch me follow right behind him and put it away...yes, this seriously happens, and he just laughs as he watches me.  I thought I'd give you a glimpse of my kitchen counter:
When I'm not cooking, this is what the counter looks like 100% of the time.
  • There is the little lamp (thanks for that AT!) that I want to do a little DIY project on.  I want to cover the shade with a different fabric by ModPodging it.  I haven't found the right fabric yet and I'm a little scared to do it as well.  
  • The butter has to sit out on the counter - have you ever tried to spread cold butter on anything?  It just tears it up and leaves you with mangled toast.  Both Peanutty and Sweet Pickle are allergic to margarine (strange, but true) so butter all the way in this house!!!  
  • Then there are the three canisters...look familiar? 
    I used these (the medium sizes) for my vast collection of writing utensils.  I have three of the larger sizes to hold our napkins, silverware and our phones/wallets.  They were $4 each from IKEA and they are so versatile.  For example:
    Ta-da!  Two of the smallest variety are keeping my fake grass look sharp and crisp!  These were $1.29 each from IKEA.  You think I'm loco for these?  You're right.  They are inexpensive and SO versatile!!!


    Drat!  My spacing is off...and can't figure out how to fix it.  Anyway, here is a closer look at these.  They are actually plant pots that I use for other things instead!  IKEA has a VERY large version that would be awesome outside - to use for plants this time, so I may have to invest in those someday.  Like I've said, IKEA isn't close to my home so me and a few girlfriends did a turn-and-burn trip to one and I made it count.  I grab a little of this and that from IKEA because I know I'll use them somewhere and they're very inexpensive.  Plus, if you want, you can always spray paint or ModPodge them if you want to change them up.  As for me, I'm digging the crisp and sterile white.  Just keeps things looking sleek and classic. 
    This beauty was another DIY project that I did last summer.  I wanted a raised serving tray but I didn't want to spend the money so...guess what I did?  I...stole yet another idea from Pinterest (at least I'm honest).  All this is, is a terracotta plate (what you'd put under a larger pot) and a small terracotta pot.  I epoxied (heavy duty glue) the two together and spray painted it white.  I use this for a multitude of things, my main purpose was to put cupcakes on it for Sweet Pickles birthday...but now, it's used to put our fruit on it.  Rather than have it sit on the counter, it's on a stylish plate.  Simple, but contained!
Good Gravy!  Now the spacing fixes itself.  I'm not re-vamping this whole post.  Grrr (insert fist raised and shaking).

One thing that I want to accomplish with my blog is to show people how I organize and maybe inspire others to enjoy organizing as much as I do.  I really love shopping at places like The Container Store and IKEA, but we don't have either of these stores where I'm from.  I've online shopped from TCS a couple times and been there twice now (it's like the Mother Ship calling me home).  While there is a plethora of items to choose from at TCS - they are a little pricey, but you can sometimes snag a few good deals.  IKEA is a fantastic place to purchase inexpensive items as well, but I've only been there three times in my life (*Side note: set aside at least 3 hours for a trip to IKEA.  There's no "I've got to buzz into IKEA to grab something" - you will get sucked in to the Swedish business*).

I get frustrated when I read other organizing blogs that have super cute items/ideas in them but they've been purchased at a.) a store that I don't have access to other than online (online shopping is great, but, I like to get my hands on the items before I buy) b.) an expensive store like Pottery Barn or c.) just totally out of my budget.  This is when I get creative.  I think outside the box and figure out something similar to what I like...but do it cheaper.  Yes, I do splurge every now and then but it's very few and far between - and sometimes, it's worth it.  My suggestions for places to shop for organizing items are:
  • Target - sigh, I can't say enough about this place.  It makes me happy.  Period.
  • Walmart - they have quite a bit to choose from and reasonably priced.
  • Dollar Stores (Dollar Tree, Dollar General) - these can be hit or miss, but every time I've been on the prowl for something...they've had it.
  • Michaels - I've gotten some pretty stellar deals from here.  Always seek out the clearance aisle..it's usually in the back somewhere and you can find some gems!  Sign up for their email alerts - you can get some awesome deals like 25% your entire purchase INCLUDING sale/clearance items!
  • Hobby Lobby - same as  Michaels, you never know what you'll find here - and they usually have a coupon online for 40% off one regular priced item.
  • TJ Maxx - hit or miss...this place gives me severe anxiety.  For real.  It's so disorganized that I have a hard time wrapping my mind around what I'm looking at.   But, sometimes you can find a very good deal!  You just have to be willing to put in the time to roam.
  • Home Goods - I've NEVER been here, BUT I've heard it's much like a TJ Maxx.  I'd love to go to one though!!!
My last photo is of me, my first time going to The Container Store - judge all you want, but it was the best 7 hours of my life!!!  And yes, this time I am kidding...it was only about 2 hours.  Until next week!

Tuesday, March 4, 2014

Kids Craft Supplies

In our home, we craft, color and create every single day.  I'm not exaggerating.  Our kids love to bust out ALL the crafting supplies we have and spread it all over the dining area.  Here's what it looks like all nice, clean and picked up (which is how it is 100% of the time it's not being used for crafting or meals...the kitchen and dining area are off limits to clutter - I'm totally serious on this one, I'm a tad bit of a psycho about this):
Nice and clean!!!  Until about 3:15 this afternoon...
Had to post a pic of my fake grass next to my Pinterest inspired center piece.  I'm confident that warmer weather is on its way...all because of my colorful bouquet and fake grass.  :)
I'm purposely showing you a pic of the cupboard and drawer.  The drawer is the official 'Junk Drawer'.  That needs to be re-assessed and purged...another post for another time.  The cupboard is supposed to be for your formal dining dishes, silverware (like REAL silverware I'm guessing), linens...you get the idea.  Well, in our home, our "casual" dining-ware is also our "formal" dining-ware...it's all one in the same.  So instead, it is now used for:
Craft supplies!  It couldn't be in a more convenient place.  It's right by the kitchen table where all the imagination happens!  Let's break it down:
The cleaning caddy (or college shower caddy...I still have mine and it's purple) turned creative caddy!  Markers, crayons, colored pencils, tape, scissors and Aqua Doodle accessories.  This gets put on the table first.  Easy access for everyone.  I just put a few Dixie cups (um...another college memory) in the caddy and filled them up.


Top shelf has 5 different containers:
  • Pipe cleaners take up one.  We use these a lot for school projects for Peanutty.
  • Flash cards, mini coloring packs (you can get these in the Target dollar bins - they have crayons, stickers and a little book in them), sticker books, mini note pads and stencils.
  • The striped container has Color Wonder markers and Sweet Pickles starter markers (just large scale markers) - there are also two packages of kids tattoo's that we keep on top of this container.
  • There is a SnapWare container that has three levels and it has pom-poms (we actually bought these for Peanutty to fill up his trucks with them when he was playing), beads and stickers.
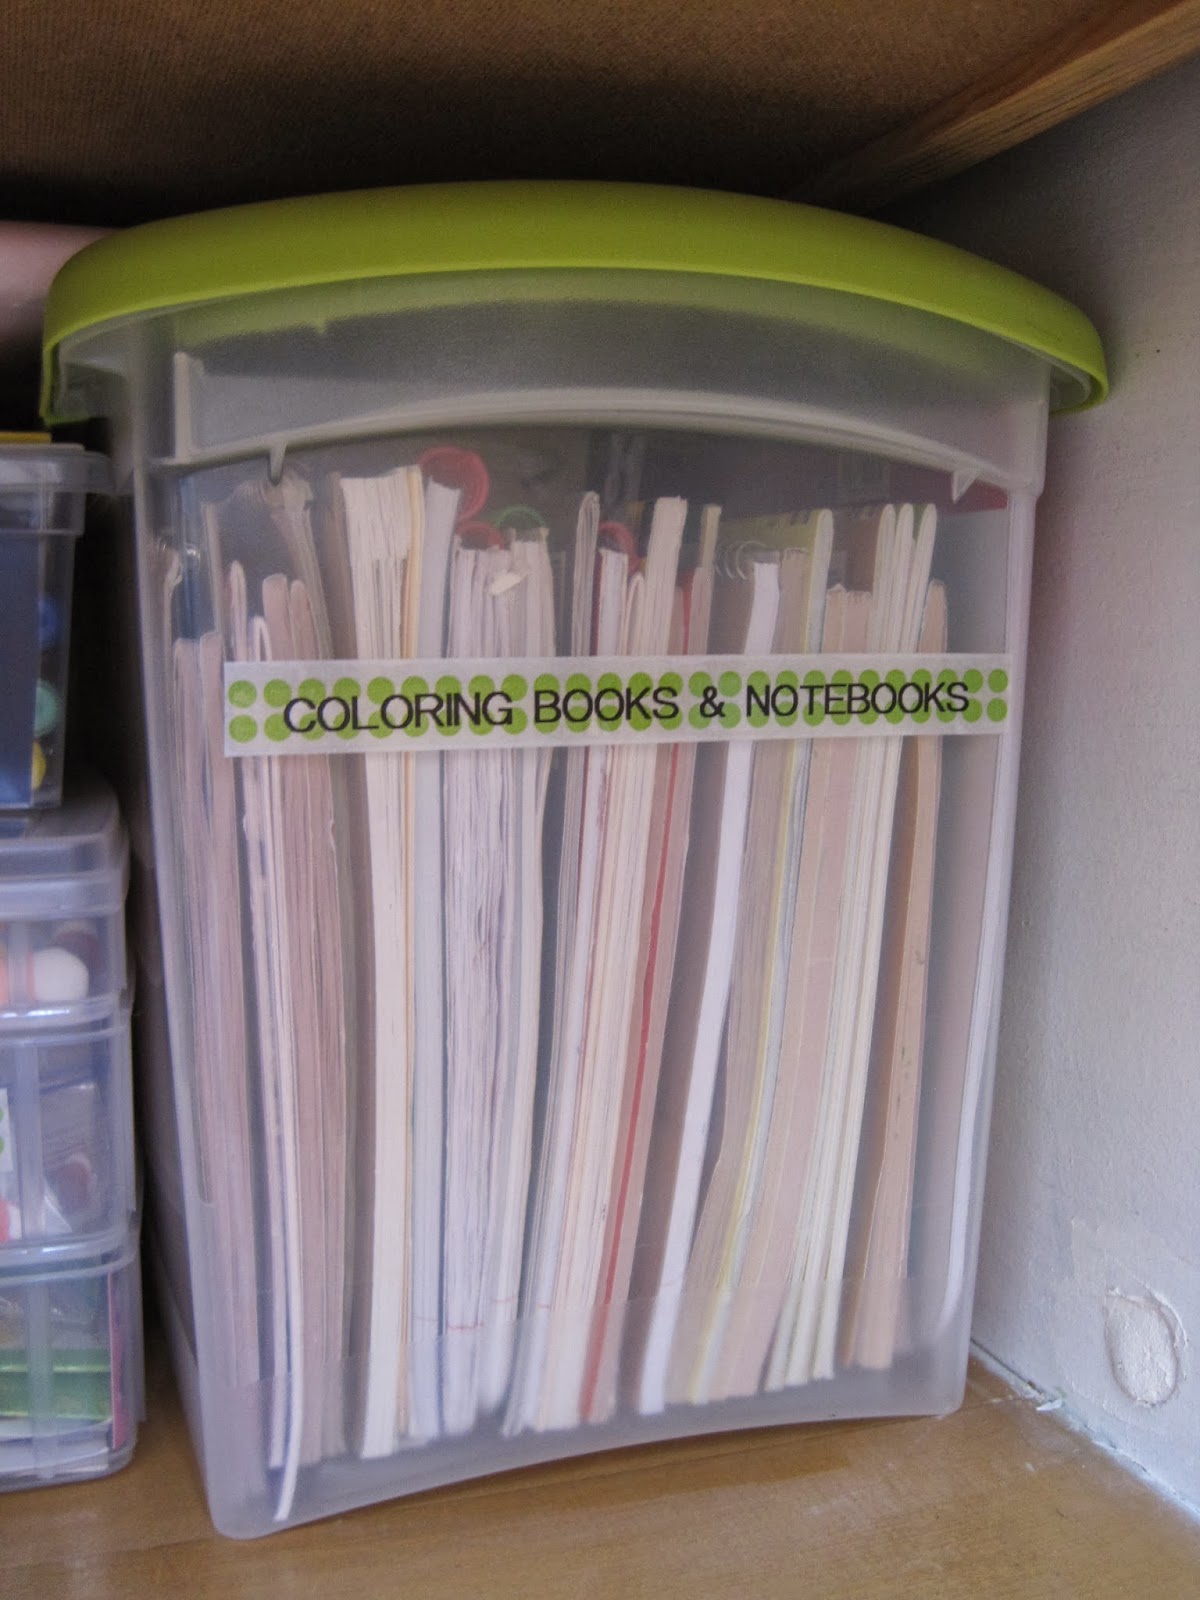
  • A HUGE container full of coloring books and notebooks.  Our kids love plain notebooks to make their own story books.  Peanutty especially loves to do this.
On top of the coloring book container is the Aqua Doodle mat.  It folds up nicely and can be stowed away easily.

Next is the bottom shelf:
Here we have some easy access to the crayon and marker towers we have.  *Side note:  The Crayola Pip Squeak marker tower has a wonderful variety of markers, but the tower is junk.  It does NOT stay up.  I complained to the company and in return got a $5 off my next Crayola purchase and ANOTHER junk tower (yay-said in a sarcastic voice) - hey, it's better than nothing.  And the little white bin has some newly acquired IKEA marker stamps.  They are super cute and were only $3.  The kids enjoy these a lot!  Breaking it down:

From top to bottom:
  • Sock Monkey stamping kit - normally I'd want to take this out of the box to save space, but in this case it fits and there's no room for another container!
  • Air Plane kit.  Peanutty received this as a gift from his Aunt, Uncle and cousin and it's been busted out about a million (OK, about 20 times).  The kids love to make a new airplane and see which one flies the furthest.
  • The container is full of paper:  construction paper, white scrap paper, and foam board sheets.
  • Under that container is the sticker pads and coloring books that are a larger scale.  
On the other side:
  • Dry erase board learning books
  • The pink container has: unopened crayons and markers to replenish our currently used stuff when needed.  Play-Doh and some accessories.  Drop cloths - we use old curtains and a cheap plastic table cloth for this purpose - when we play with Play-Doh, one of these gets laid down on the ground for easy clean up.  We just grab it, take it outside and shake it out.  Easy peasy!  There is also extra glue sticks in this container as well!
I used containers we had already to do this cupboard (all of the containers were purchased at Target or Walmart - I do remember getting the caddy after the beginning of the school year for $1.98 - woot!).  I love having clear containers so you can see what's in each one, but of course I labeled each one with Washi tape and my label lover - I mean maker.  I purposely used the hot pink container to hide the Play-Doh and extra crayons and markers...they see Play-Doh and they go nuts!  So, I keep the Play-Doh concealed and bust it out when we need it most...cold days, snow days and rainy days!

So, there you have it!  Our crafting supplies cupboard!  It works for us and the kids can get to it without assistance...which sometimes proves to be a DISASTER!!!  Luckily, they're pretty good about helping clean it all up.

*I will not be proof reading this post...I'm running short on time, so if there are typos or grammatikal (hee, hee) errors, eh (insert shoulder shrug), it happens.  Think of it as a game!